How to Create Your Own Photo Calendar for 2017
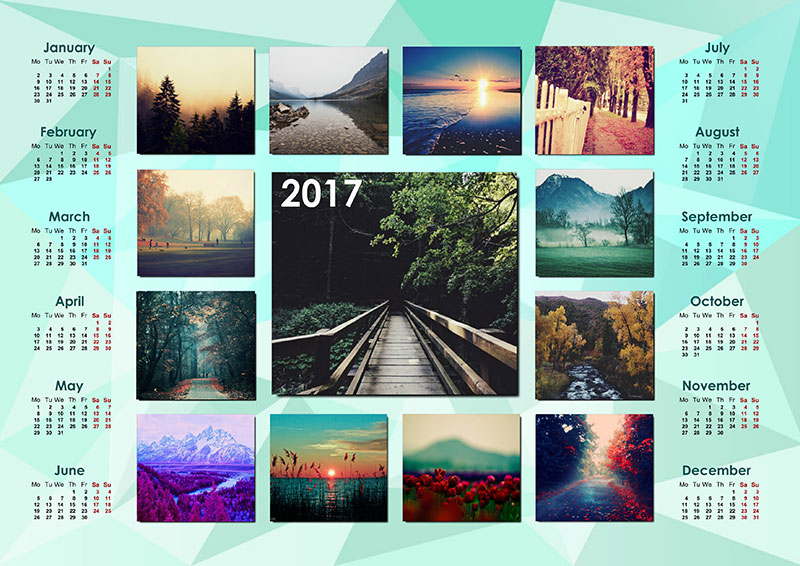
Living in the 21st century, we enjoy plenty of sophisticated devices that make everyday activities easier than ever. There’re almost endless opportunities locked inside our smartphones, including perfect tools for scheduling and arranging personal time. You would probably ask why bother making a printable calendar when you already have a similar app on your tablet or cell phone. Being a techno geek myself I would still say a rather unusual thing, but digital calendars lack a personal touch. Don’t want to take my words on trust? Read this tutorial and see for yourself that printable calendars are still alive and kicking!
Step 1 – Choose the Type of Your Calendar
If you’ve decided to create your own photo calendar, you’ll need an efficient tool that will bring your ideas into reality. As I’ve been using http://photo-calendar-software.com I’ll guide you through its basic functions. In this app yearly calendars fall into two basic groups: one-page and multi-page designs. Those who want to experiment with every single page should pick multi-page templates. I’ve chosen a wall calendar, though, since it’s the best fit to hang on the wall or set as a wallpaper.
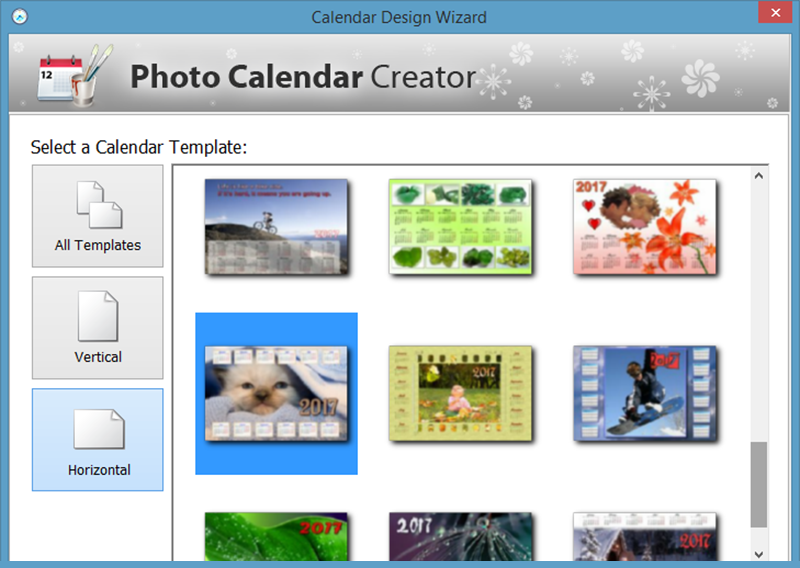
Pick a calendar template for further customization.
Step 2 – Add a Cool Image or a Picture Collage
When you ask yourself how to create your own photo calendar, probably you have some image in mind that you want to use in the design. Luckily, you have plenty of opportunities. Pick a bright eye-catching picture and add it to your calendar page as a solo attractor. If you want to give this image a new look, send it to the background and place calendar boxes above it. A grid collage is also great to fill the page space. The composition I’ve made displays all the photos in a favorable light.
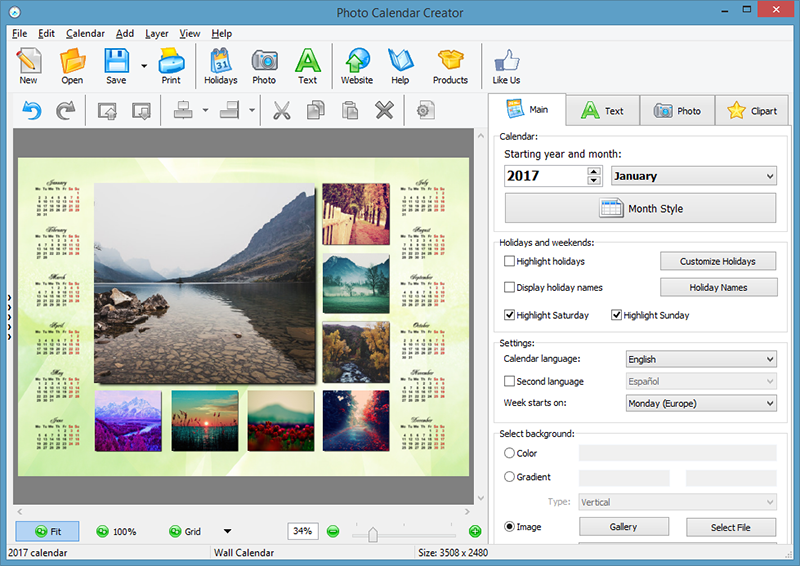
Position the photos you’ve chosen on the calendar page.
Step 3 – Find a Fitting Month Style
Don’t reduce the creative process of making your own calendar to inserting photos and choosing the right paper size for printing. The heart of any calendar design is month boxes. They come in the form of decorative cliparts, one-liners, tables and schedules. Open Template Editor to change text fonts, the color of the header and weekdays, as well as the size of these captions. In the end you’ll get a personalized month style that can be saved as a template and used in future designs.
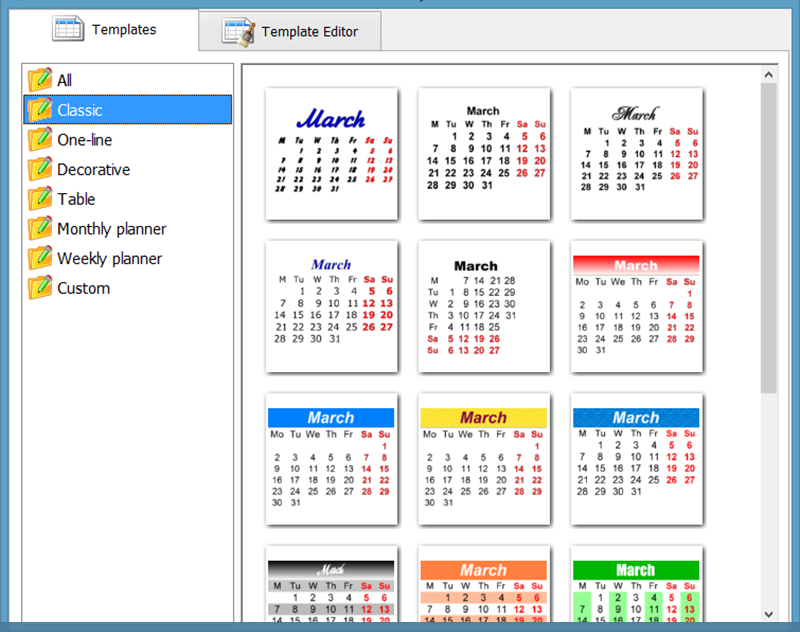
There’re plenty of month styles to try in your calendar design.
Step 4 – Be Specific & Consistent in Designing
When working on your calendar, try to be specific. Choose some topic or style and stick to it. If you try to combine family and abstract photos into a single calendar, it won’t do any good. Make the idea behind this design clearly visible to all viewers. Then you’ll create your own photo calendar that looks neat and polished, and can beat its retail rivals.
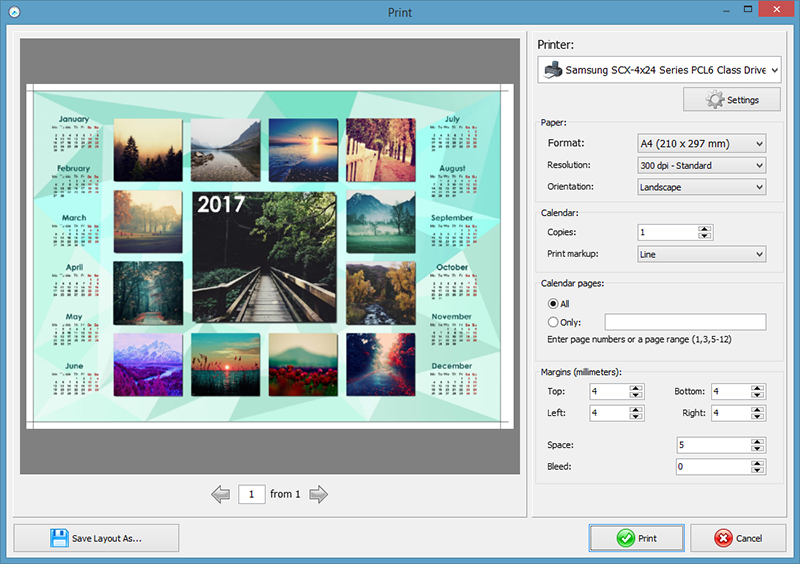
Print your calendar with the help of the built-in wizard.
Although I use scheduling apps on a regular basis, I take certain pleasure in leaving some notes and reminders in my old-fashioned desk calendar. Printable planners can be efficient reminder tools, nice details in your interior and cute DIY gifts for your loved ones. Hope these tips will be useful once you decide to create your own photo calendar for 2017!


